No doubt, VLC is the best free and open source media player available for streaming offline and online videos. However, the lesser known fact is that you can also fix common video playback errors using VLC itself. VLC media player is built in such a way that it can fix corrupt, unplayable and low-quality videos.
If you are having any corrupt or unplayable videos stored in your computer, read this informative write-up till the end and know how you can fix these common video playback errors using VLC media player.
Repair Corrupt Videos Using VLC
If your video file is scrambled, choppy, facing file reading failed error or having a broken header, it means that your video file is corrupted.
You need to replicate them to an avi format (similar to save as function) and open them in VLC media player.
Follow the steps given below to know what should be done after replicating those corrupt videos.
Step 1: Create a copy of the corrupted video file and rename it with .avi extension.
Note:If the video file which is corrupt is already an AVI format skip the above step and proceed with the next step.
Step 2: Open VLC, click on Preferences and then select Input / Codecs.
Step 3: Change the preference of Damaged or incomplete AVI file to Always fix.
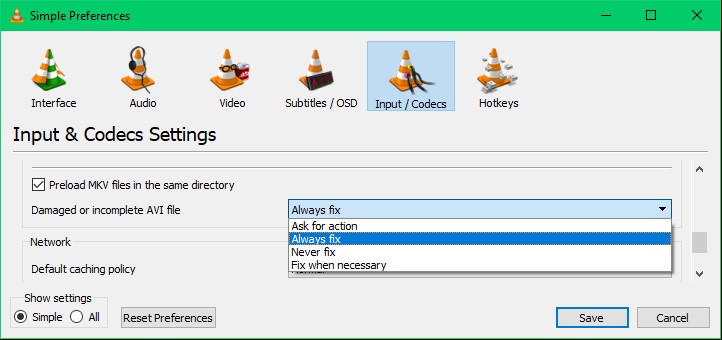
Step 4: Click on Save and try playing the video. Your corrupt video files should be fixed.
How to Fix Quality Issues Using VLC
If your video file is playing in low quality or if you feel your video’s quality has been compromised, repair those videos with the help of VLC itself.
Just follow the steps given below and your video playback quality will be fixed.
Step 1: Open VLC, click on Preferences and then select Video.
Step 2: Uncheck the Accelerated video output (Overlay) option and click on Save.
Disabling this option will prevent VLC media player from altering the original frame rate preference and compression in the quality.
However, if your video has severely damaged pixels or frames, you will be needing a professional video repair tool.
CAT Video Repair tool segregates the audio and video frames from the damaged file and refers to the healthy file chosen by you to add healthy frames to the video. Make use of the free preview feature to verify the video quality post repairing.
Note: The healthy video file given for reference should be shot from the same camera or source.
Fix Video Errors Related to Codec Using VLC
While trying to play videos on VLC and if you are prompted with 0xc00d36c4 error code, this means that your video has corrupt, incomplete or incompatible Codecs. Do not download codecs pack from any third-party software or website as VLC itself can fix video errors related to Codec. Follow the steps mentioned-below to know how.
Step 1: Open VLC and click on Tools.
Step 2: Select Preferences and click on Interface.
Step 3: Under Privacy / Network Interaction, check Allow metadata network access and click on Save.
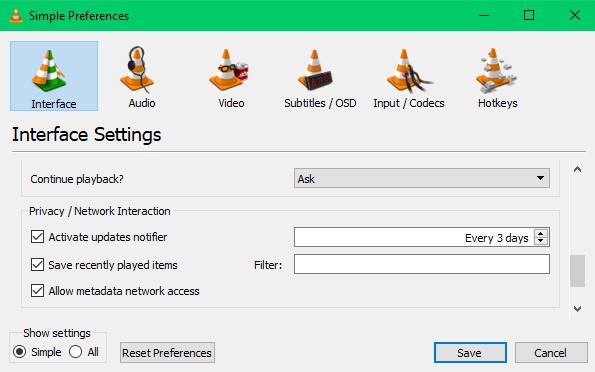
This will give internet access to VLC media player and whenever a video file is played with missing codecs, VLC automatically fixes them.
Repair Unplayable Videos by Converting Using VLC
An unplayable video refers to damage on the file structure which makes it difficult to fix the video even after following the above-mentioned methods.
Converting these unplayable video files using VLC media player is the most effective solution as this process organizes the video with a healthy file structure of selected format.
Follow the steps mentioned-below to know how you can repair those unplayable videos using VLC.
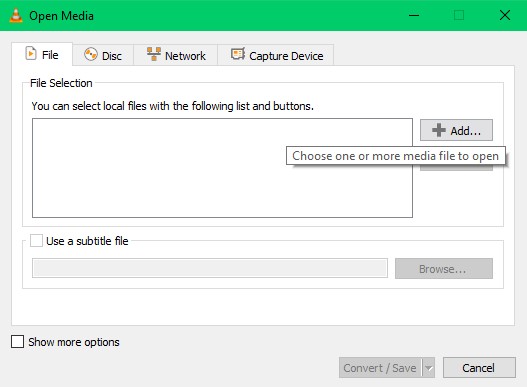
Step 1: Open VLC and click on Media. From the dropdown, select Convert / Save option.
Step 2: Add the video to the list and then click on Convert / Save.
Step 3: Click on Edit selected profile.
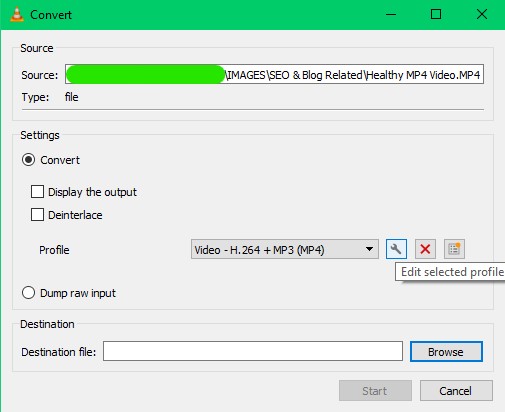
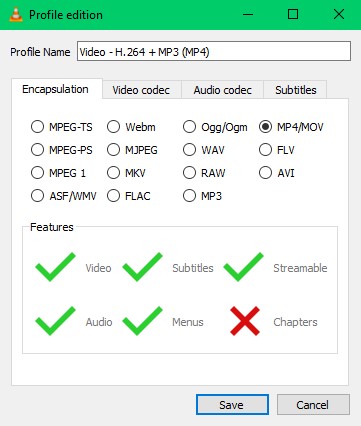
Step 4: Select MP4/MOV and hit on Save.
Step 5: Browse the destination folder and click on Start to start the conversion process.
Note: You can convert the unplayable video to any file format as shown in the image but, it is suggested to convert it to MOV / MP4 file format.
Once your unplayable video file is converted to MOV or MP4 using VLC, your video will be playable now.
However, if the video is not repaired even after converting them, using a professional video repair tool like CAT Video Repair will be your last resort.
Being a professional tool, it takes reference of the healthy MOV file to reconstruct and ensure precision of repair conducted on the damaged video file.
Just select the unplayable MOV file along with a healthy MOV file (shot on the same camera or downloaded from the same source) and click on repair, your video file will be fixed.
Note: CAT Video Repair tool works only on the copy of your unplayable video file. This prevents further damage to the original video file.


