It is a fairly easy process to backup Outlook emails to external hard drive and there is more than one way to go about it, but before you do so please ensure that the following needs are met-
- Outlook has the latest update installed.
- The external drive is formatted to NTFS (preferably).
Method 1: Backup Outlook emails to External Drive Using Import/Export Wizard
You can easily back up your Outlook data and save it as a PST file simply by using Outlook’s built-in Import/Export feature. Follow the steps given below to do so.
- Connect your External drive to your PC.
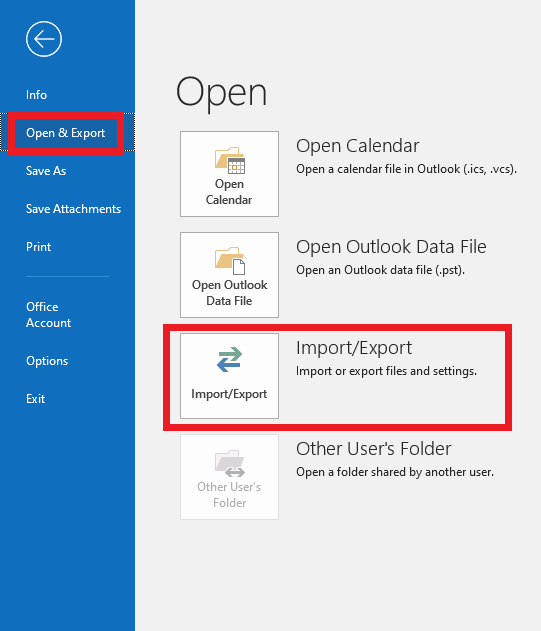
- Open Outlook and click on File.
- Access the Open & Export Tab, and select the Import/Export option.
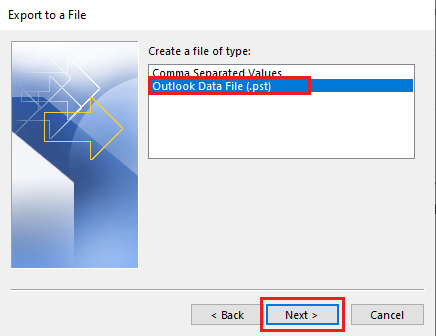
- Select Export to a file and click on Next.

- Select Outlook Data File (.pst) and click on Next.
- Next, choose the Outlook profile that you wish to backup and click on Next.
- Select your external drive as the save location for the exported PST file and click on Finish.
Your data is saved as a PST file which will act as a backup and you can easily export Outlook PST files if need be.
While it is easy to transfer Outlook data to an external drive, the conventional method has its limitations where it cannot selectively save items, rules, and settings. If you want a more advanced backup solution use CAT Outlook Transfer.
Method 2: Backup Outlook emails to External Drive Using CAT Outlook Transfer
You can easily back up your Outlook emails by using the CAT Outlook Transfer tool. In addition, you also have various features to customize the backup process. To create backups, follow the steps as shown below.
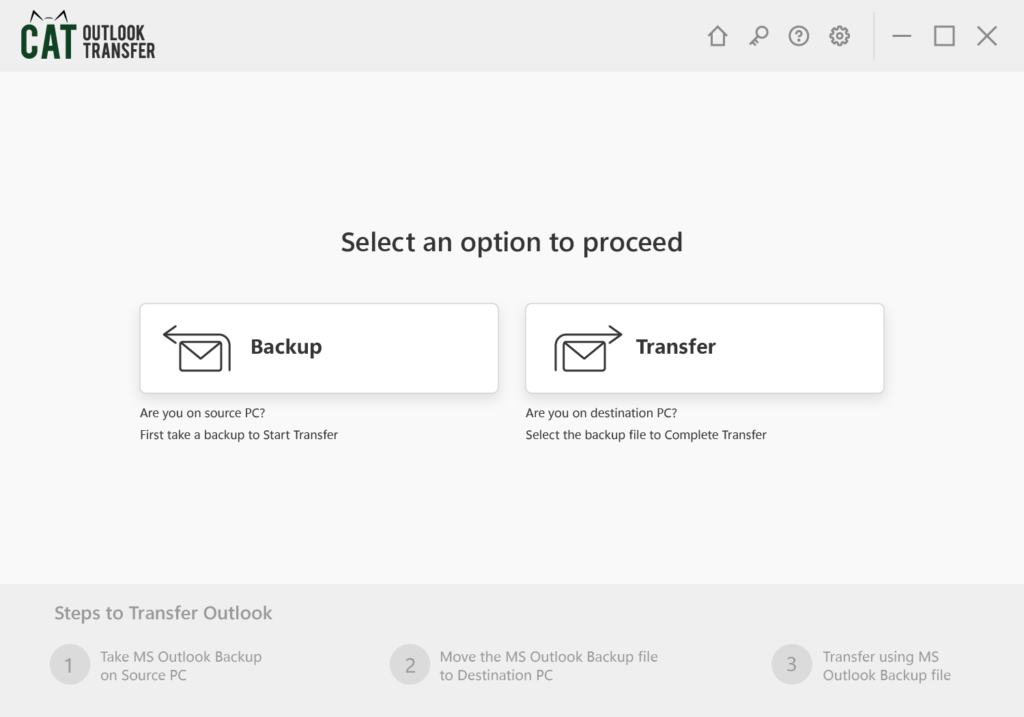
- Download and Install CAT Outlook Transfer software.
- Run the Application and select the option Backup. You will see two settings: Smart Backup and Advanced Backup.
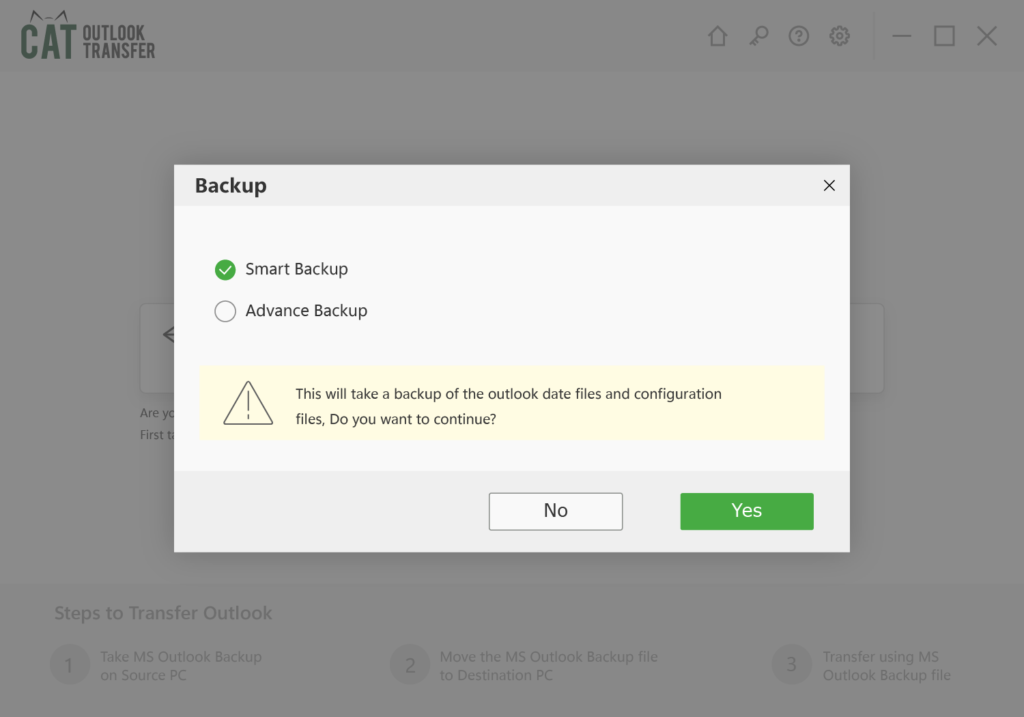
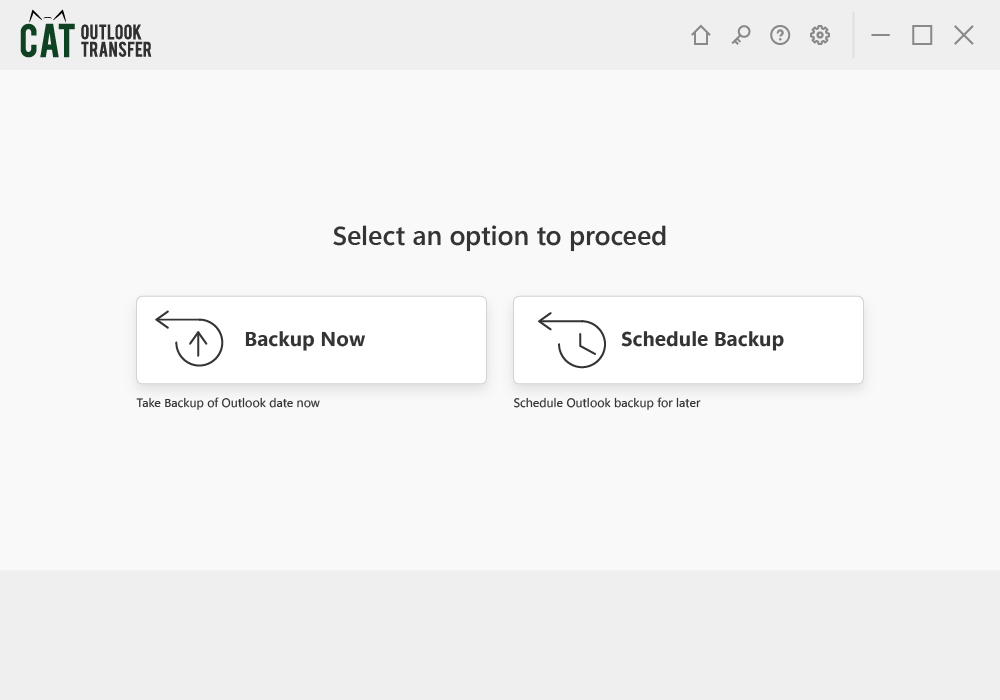
- Select the option Advanced Backup, you will see two options Backup Now. and Schedule Backup. Choose according to your preference.
Backup Now
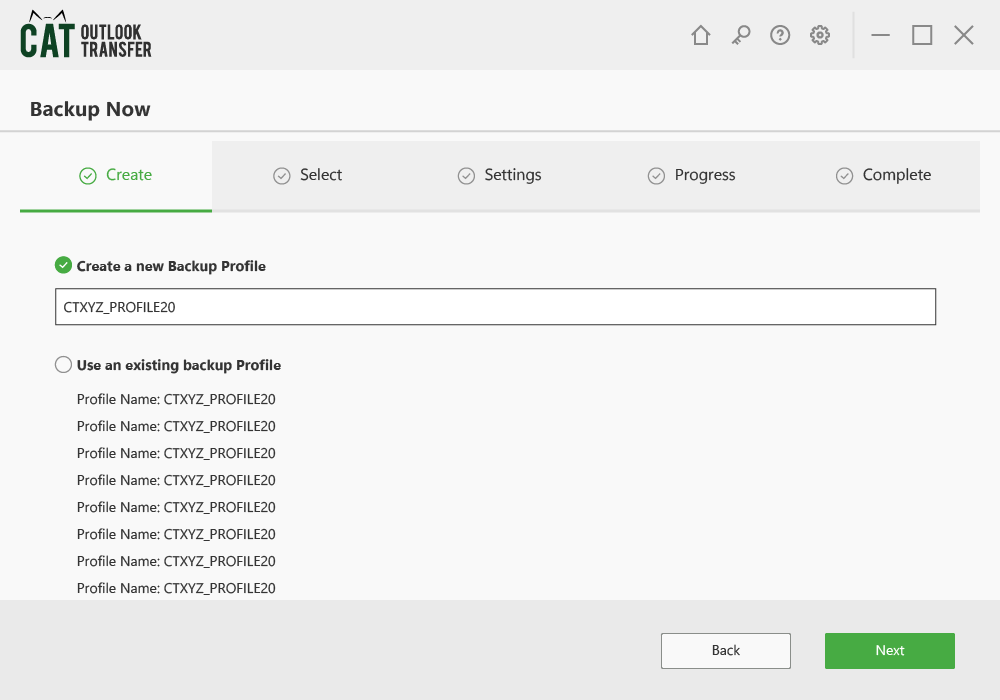
- You will see two options to create a Backup Profile or use an existing one. Select the Create a new Backup profile option and press Next.
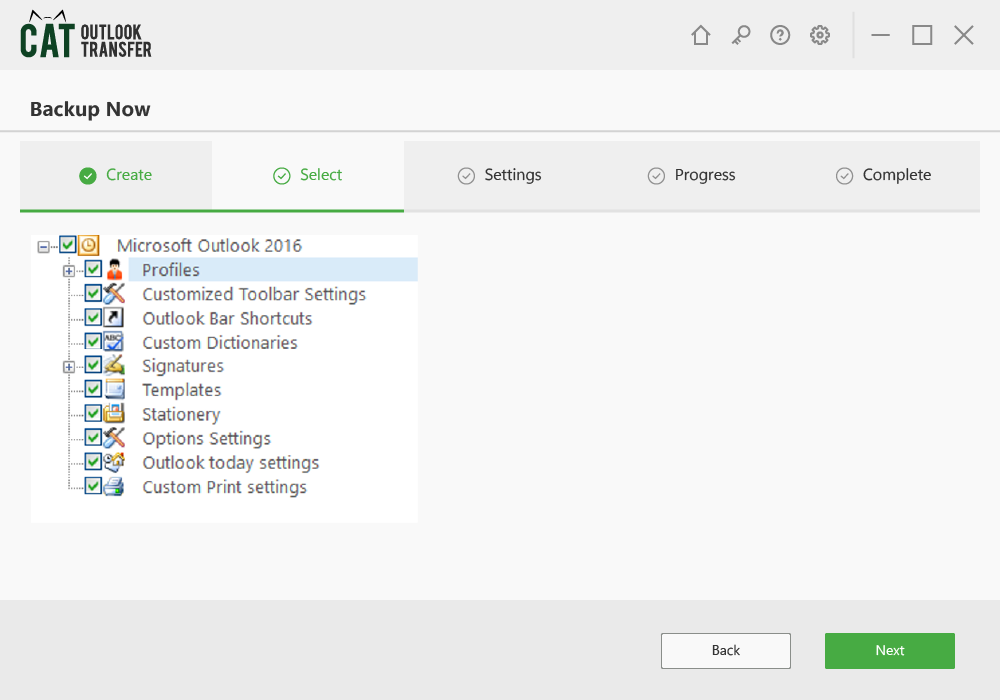
- A list of items will appear. Check the box of items you wish to back up, uncheck the items you do not want to back up, and press Next.
- In the Settings Tab, click on Browse under the Choose Destination Location section and select the location as the external hard drive.
- Here you can also compress, split, and password-protect the backup file. After customizing the settings press Next.

- Your data starts backing up. You can Pause or Stop the process if you do not wish to continue.
- Upon completion, all the backup files will be listed. Press Finish to finish the process.
Your Outlook email and other data have been successfully backed up on the external drive.
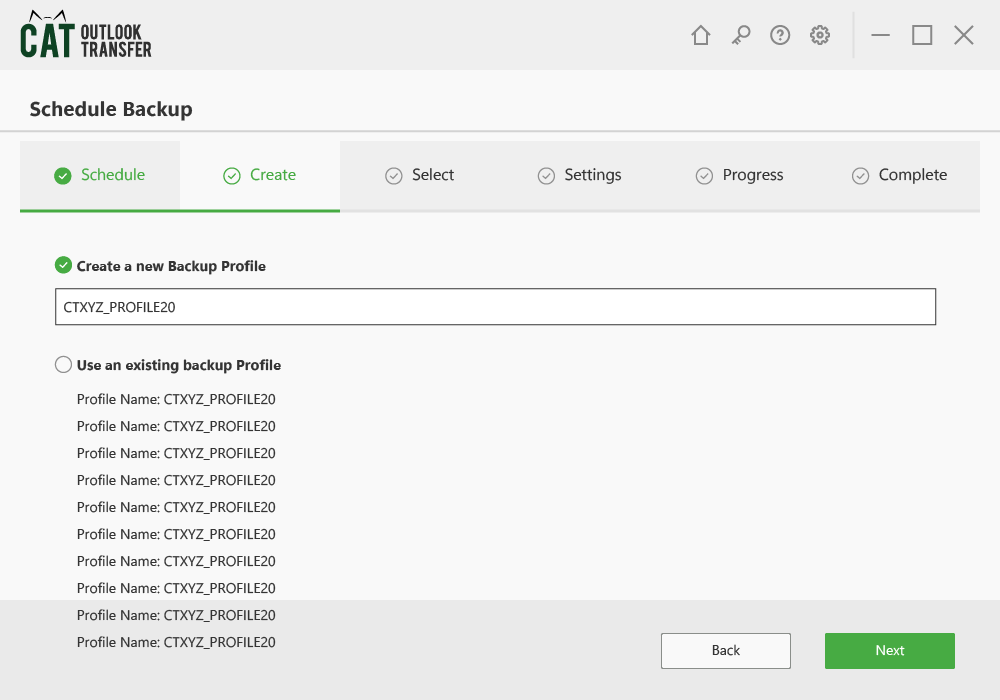
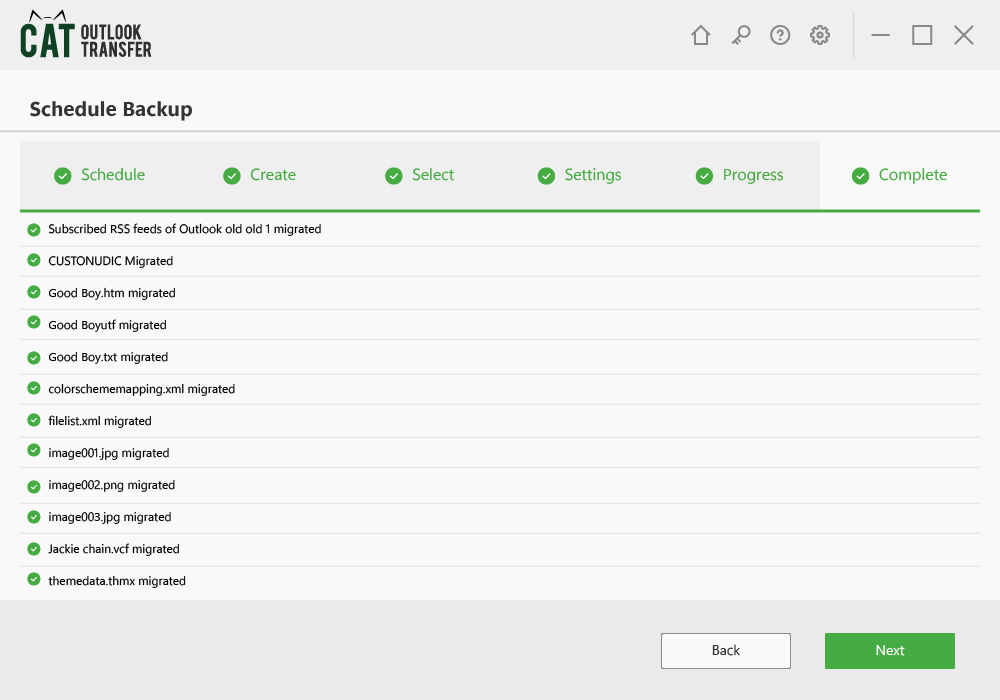
Schedule Backup
If you want your data to get backed up regularly and want to create a scheduled backup, it can be done with ease.
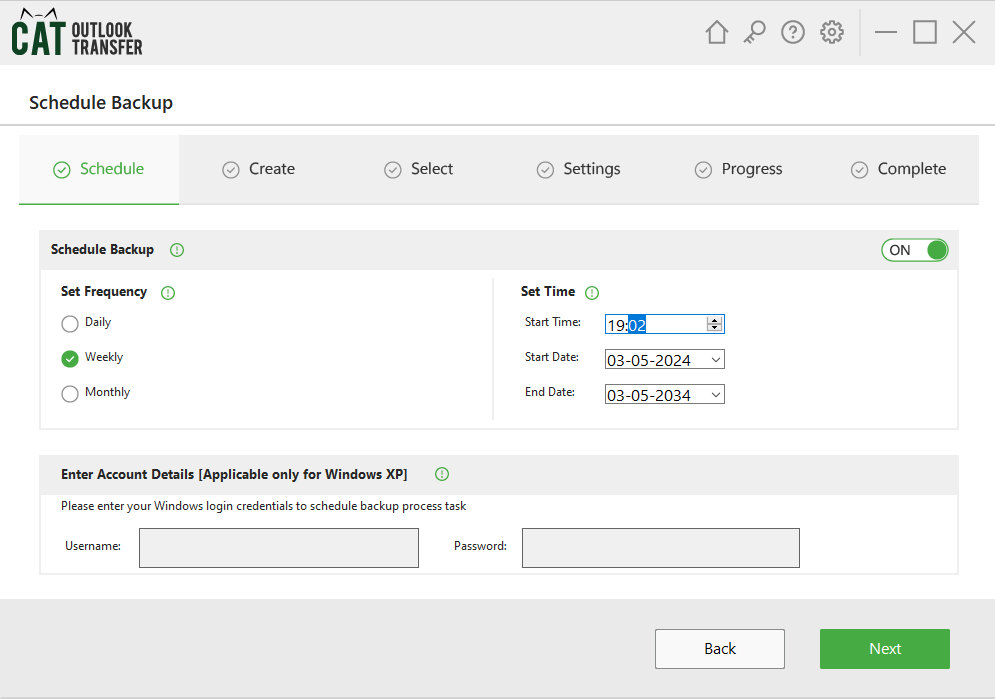
- Turn on Schedule Backup and select the Backup Frequency and Backup Time.
- Create a Backup profile or select an existing profile to backup data to.
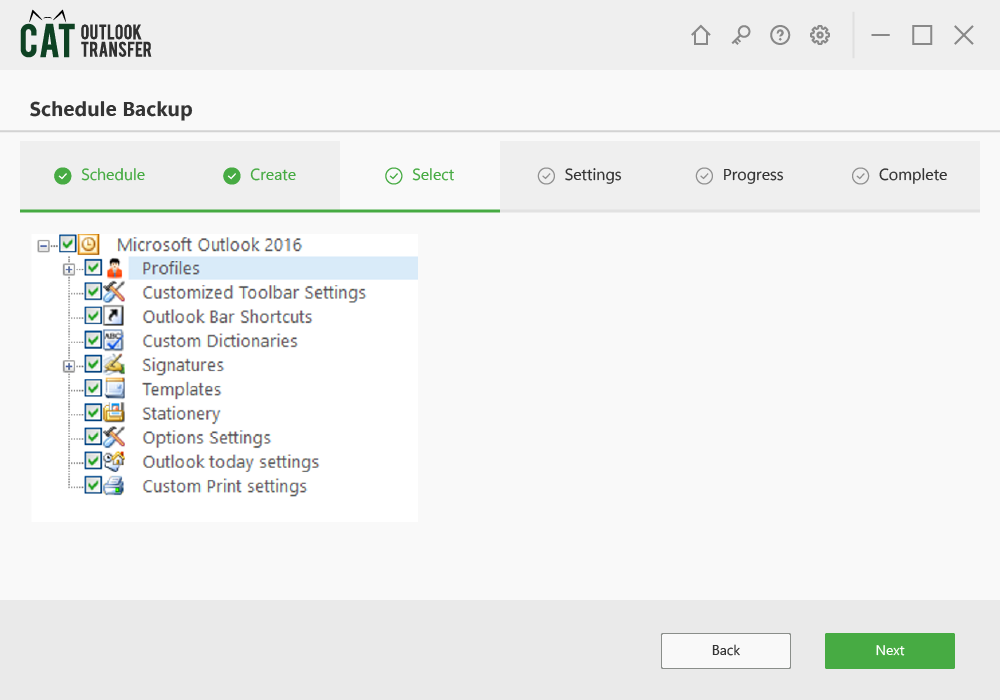
- In the Select tab select the items you want to backup.
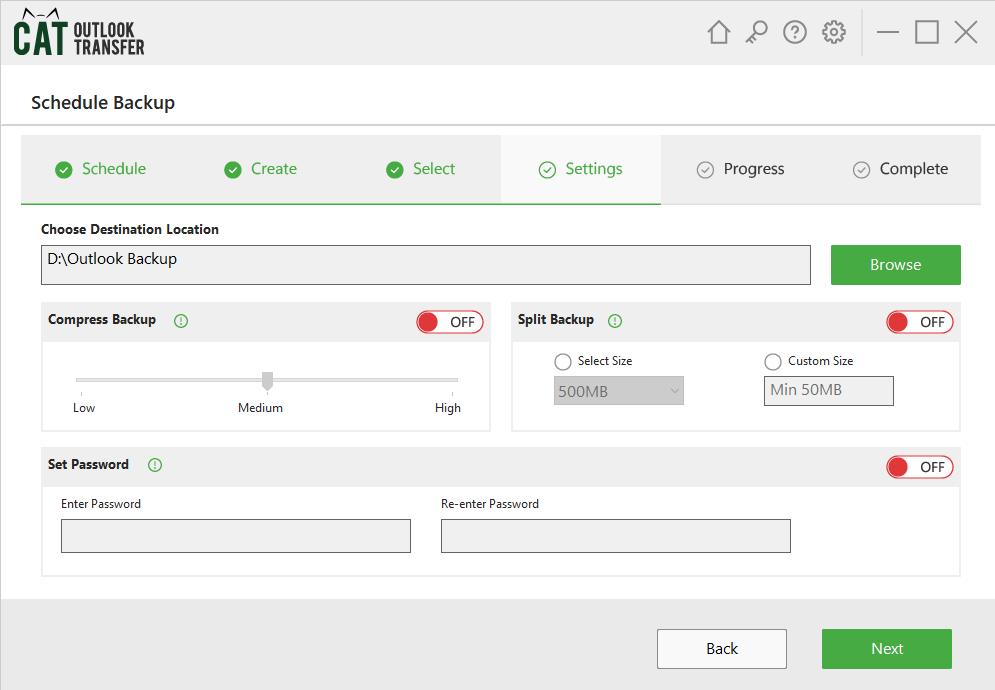
- In the Settings Tab, you can select the destination location of the backup, compress the backup file, split backup files, and password-protect the backup file. After customizing the settings press Next.
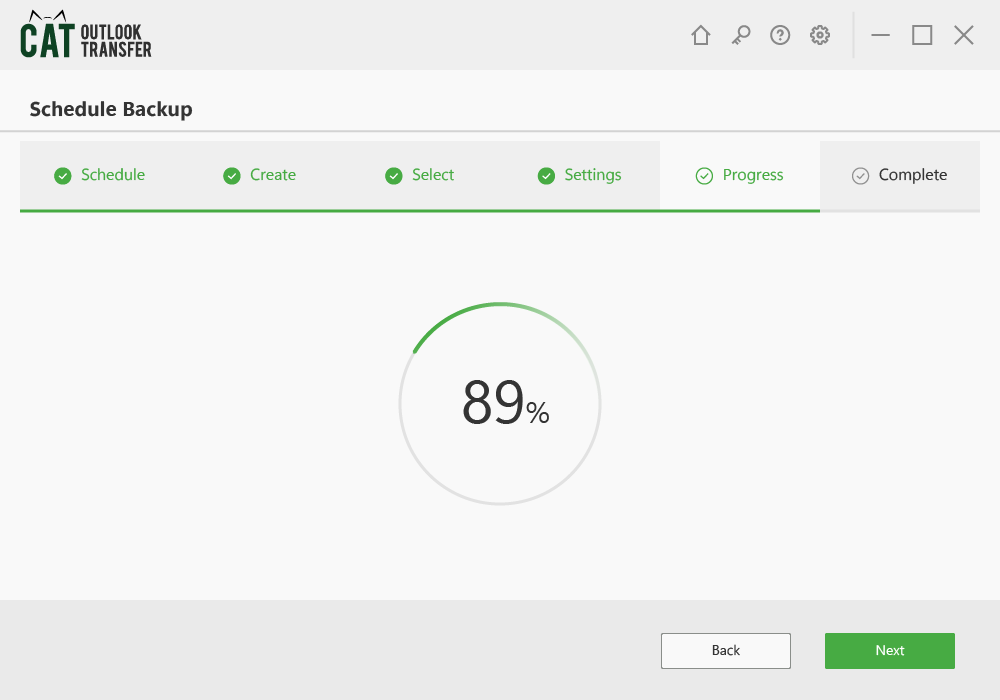
- Your Schedule backup will start setting up. Click on Next to continue.
- Upon completion, all the files will be listed. Press Next to finish the process.
- A schedule backup is created and your data will automatically back up in the background at the scheduled time.
Note: If your computer is turned off, or the external backup is not connected at the time the backup was scheduled, the backup will automatically start the next time the system is turned on and the external hard drive is connected.
Conclusion
I hope you were able to easily back up your Outlook emails to your external hard disk using this article. If you have any queries or suggestions feel free to reach out.


